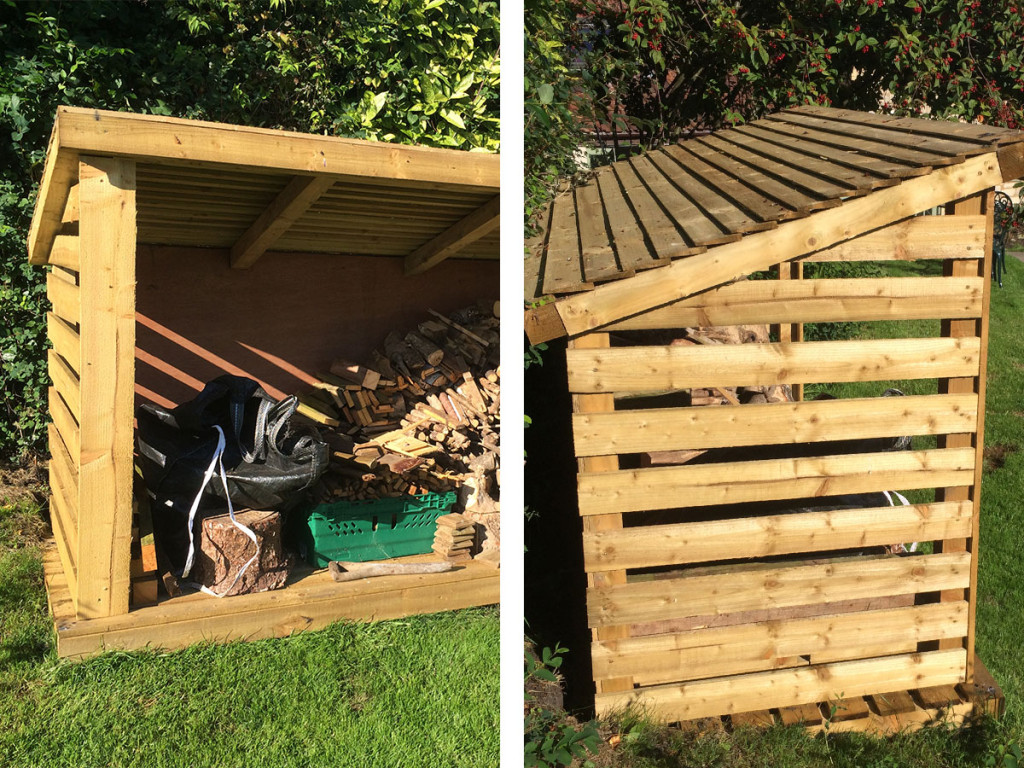
Since we moved in, I’ve been dying to tear down the old (and very leaky!) woodshed and build myself a new shiny (…as shiny as wood can be…) one. After a bit of research on the inter-web I decided a few key things:
- I wanted the shed to have a raised and slatted floor to let any water through and for air to circulate freely
- That slatted sides (if spacing is done carefully) are superior to solid sides as they allow airflow which helps prevent damp / mould build up.
- I wanted a wooden roof!
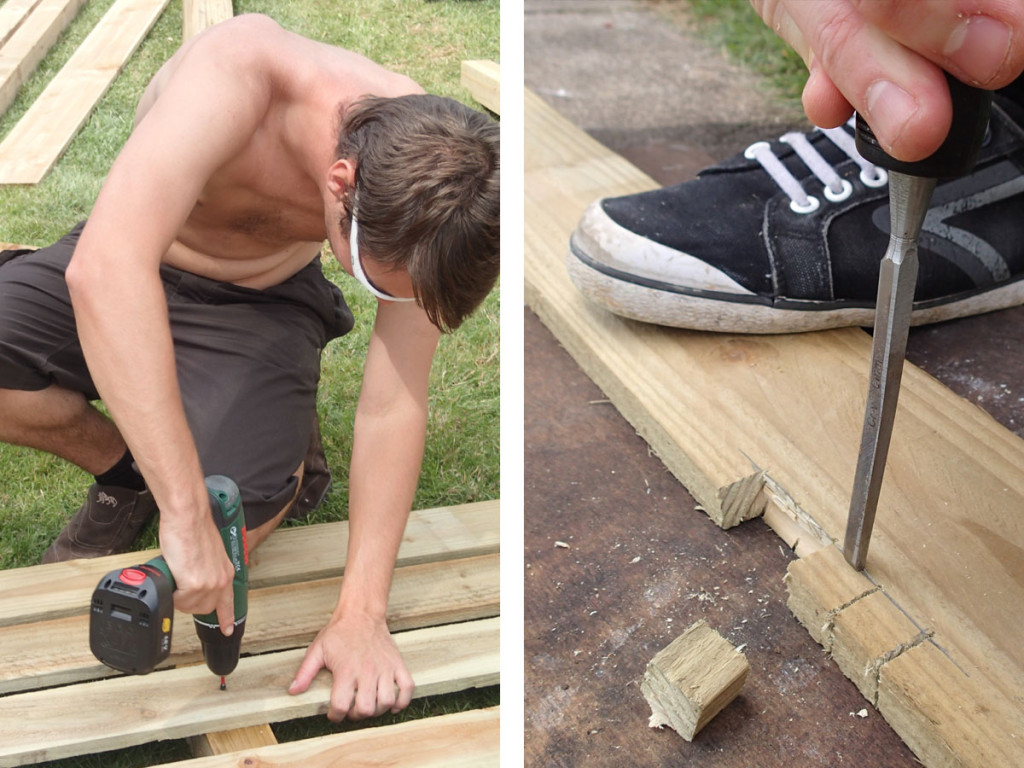
After some initial pencil sketches I ordered some wood from Wickes (total bill was ~£200) and roped in my very good friend Lee (who happens to be both skilled with woodwork and an architect) to help me with the build.
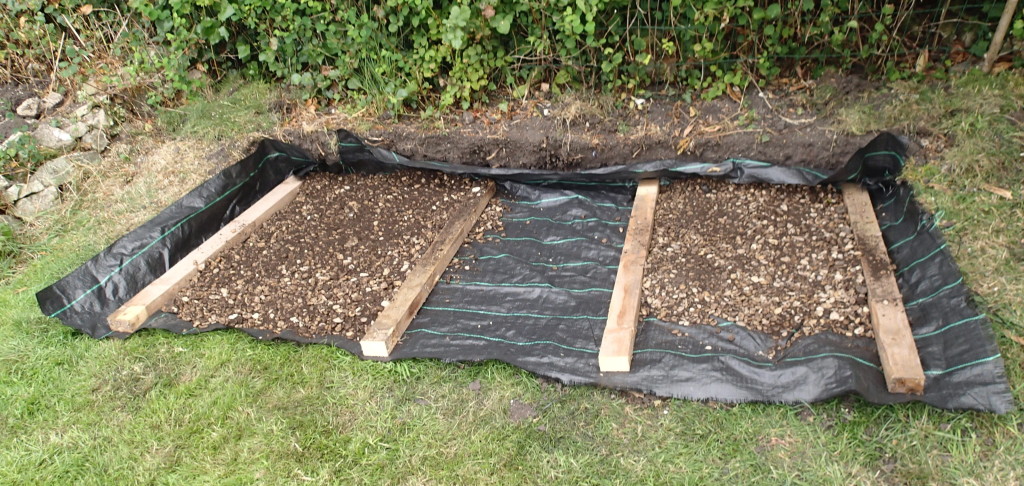
Before we began, I cleared and leveled a patch of ground ready for the shed. We covered this with weed suppressant fabric and then added a layer of stone chippings to make it less attractive to unwanted animals.
The woodshed build started with the building of the base, which measures 2.4m in length (picked due to available wood size) and 1.1m in depth (my preference).
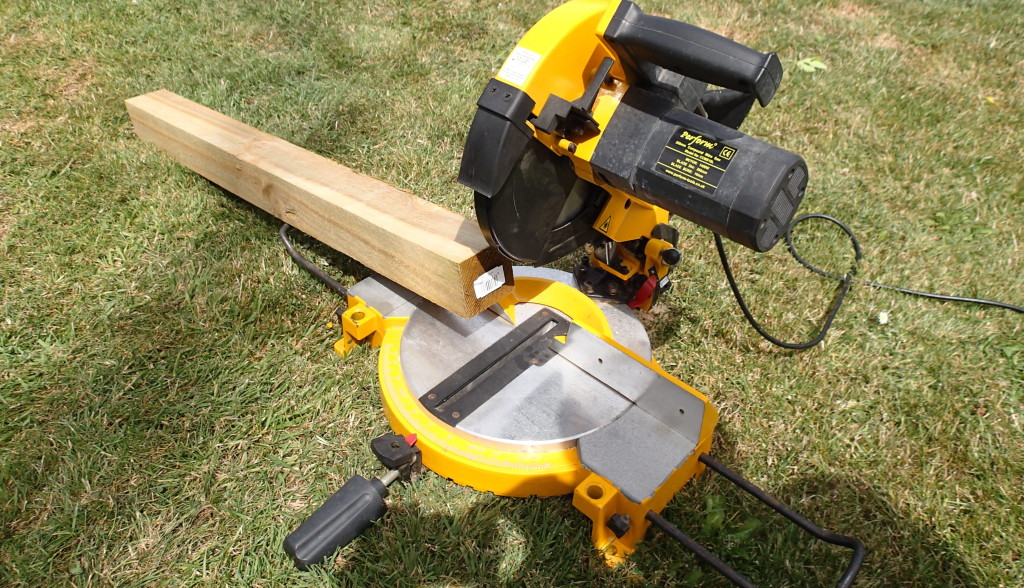
Luckily, Lee brought his Mitre saw with him. I highly recommend borrowing / renting / buying one if you’re going to undertake a similar project.
We then added the uprights. The front two are about about 30cm higher than the back two, to allow for a sloped roof to be added later on.
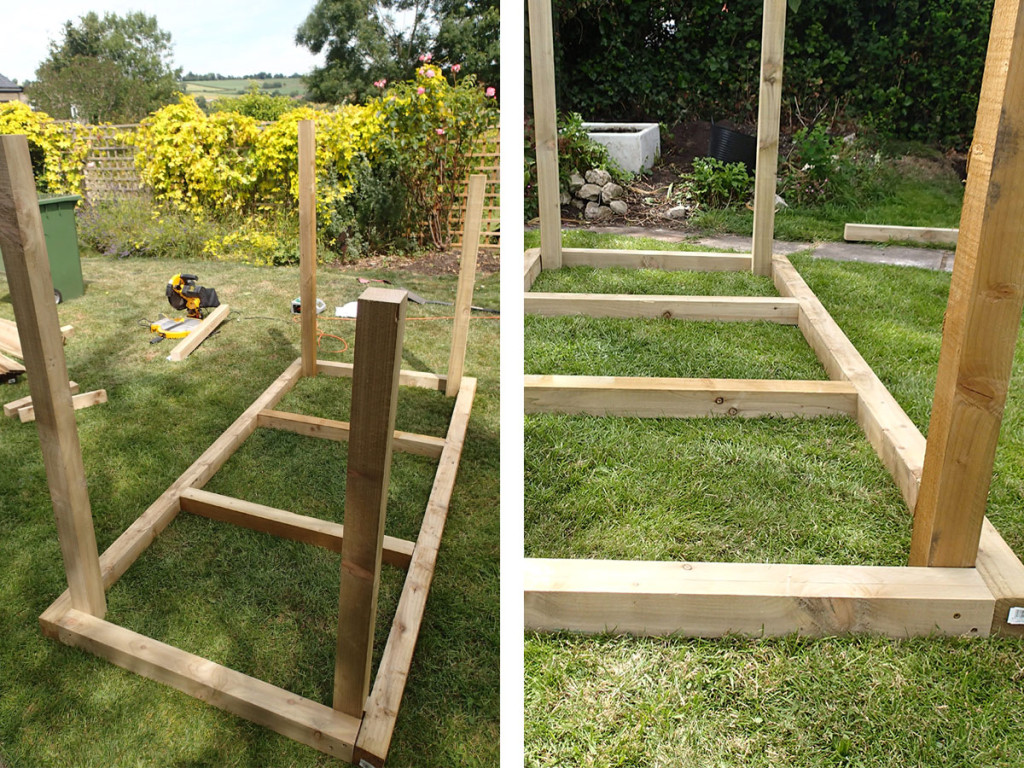
Once the base was complete we added the slatted floor, carefully cutting notches in a few boards for the uprights.
Next we attached a sheet of marine ply to form a solid back. I specifically wanted a solid back to stop the hedge (against which the shed was to be placed) from growing through. The marine ply should withstand the weather and we’d expect it to be solid for a long time.
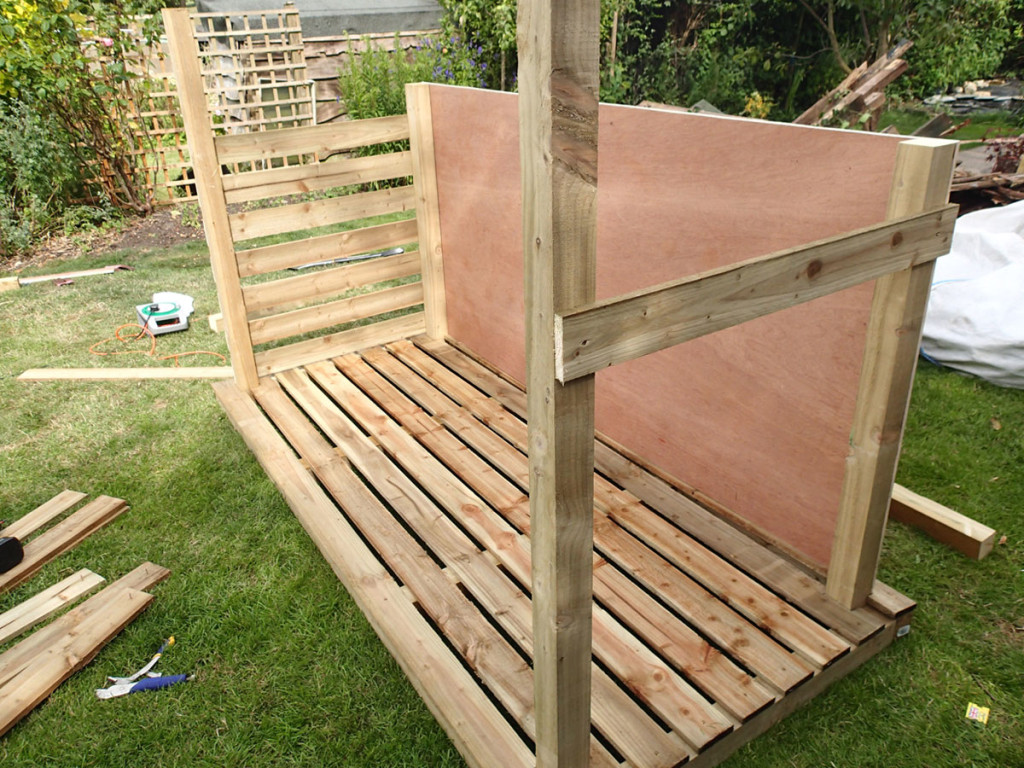
Finally, slats were added up the side at 2.5cm intervals and we moved the shed into place. We also cut two slots in the ply for the roof. If I were doing this again, I’d cut the slots before adding the back. Lee however maintains that it was intended from the outset to ensure we got the slots in the right place…

The roof frame was almost identical to the base, only slightly deeper to account for the diagonal angle.

The final step was to add the featherboard roof that I’d fancied. I’m pretty happy with the end result, and am now planning a smaller sibling nearer our house for a smaller stack of wood.